AKAI MPD226
SETUP
No driver software is required for the AKAI MPD232 to be installed. The device is a USB class compliant and your Operating System will auto-install the necessary driver when connected with a USB cable. The unit offers external powering as well, but is not required for the unit to operate (USB bus powered)
VirtualDJ Setup
Once VirtualDJ is launched, a Connect Window will appear. Login with your virtualdj.com account credentials. A Pro Infinity, a Home Plus or a Pro Subscription License is required to fully use the AKAI MPD232.
Without any of the above Licenses, the controller will operate for 10 minutes each time you restart VirtualDJ.
http://www.virtualdj.com/buy/index.html
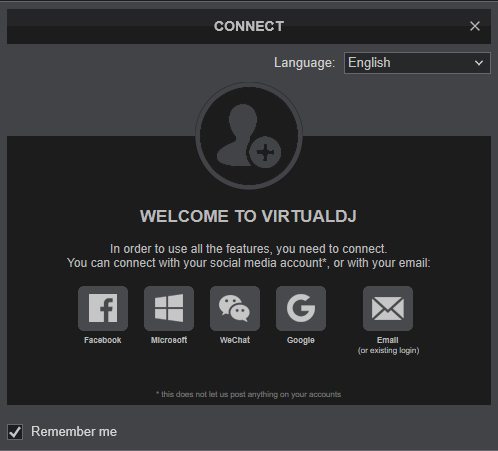
Click to OK.
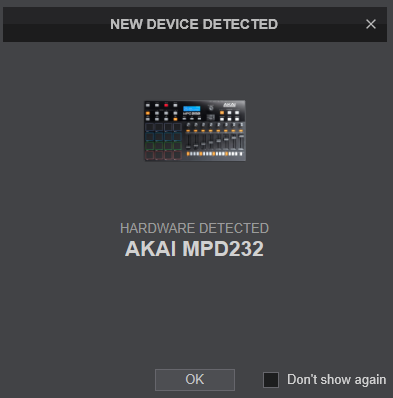
The unit is now ready to operate.
For further software settings please refer to the User Guide of VirtualDJ. http://www.virtualdj.com/manuals/virtualdj8/index.html
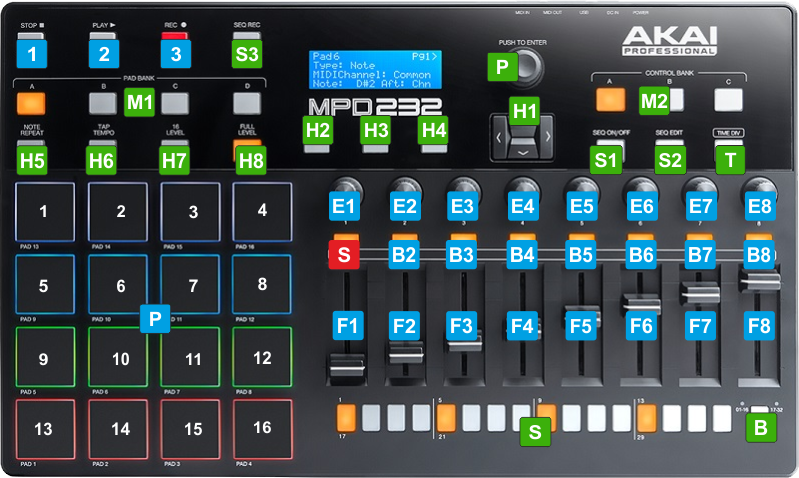
PADS

KEY
ACTION
SHIFT (SECONDARY) ACTION
* The PROGRAM select knob and the PAD BANK buttons are hardware controls, they do not send any MIDI message, so cannot be assigned to a VirtualDJ action.
PAD BANK A - Sampler Mode
KEY
ACTION
SHIFT (SECONDARY) ACTION
PAD BANK B - Effects Mode
KEY
ACTION
SHIFT (SECONDARY) ACTION
Pad 1/9 : Triggers the selected Effect on the Left/Right Deck. If FX Temp is enabled (Pad 8/16) the Effect will be activated while the Pad is pressed (temporary)
Pad 2/10 : Selects the previous available Effect of the Left/Right Deck.
Pad 3/11 : Selects the next available Effect of the Left/Right Deck.
Pad 4/12 : Toggles between the Single FX mode (LED Off) and the Multi FX mode (LED On) for the Left/Right Deck.
Pad 5/13 : Controls the 1st FX button (if available) of the selected Effect for the Left/Right Deck.
Pad 6/14 : Controls the 2nd FX button (if available) of the selected Effect for the Left/Right Deck.
Pad 7/15 : Controls the 3rd FX button (if available) of the selected Effect for the Left/Right Deck.
Pad 8/16 : Toggles FX Temp mode for the Left/Right Deck. Effects will be triggered temporary when enabled (LED On)
In Multi Effects mode :
Pad 1/9 : Triggers the selected Effect in FX Slot 1 on the Left/Right Deck. If FX Temp is enabled (Pad 8/16) the Effect will be activated while the Pad is pressed (temporary)
Pad 2/10 : Triggers the selected Effect in FX Slot 2 on the Left/Right Deck. If FX Temp is enabled (Pad 8/16) the Effect will be activated while the Pad is pressed (temporary)
Pad 3/11 : Triggers the selected Effect in FX Slot 3 on the Left/Right Deck. If FX Temp is enabled (Pad 8/16) the Effect will be activated while the Pad is pressed (temporary)
Pad 4/12 : Toggles between the Single FX mode (LED Off) and the Multi FX mode (LED On) for the Left/Right Deck.
Pad 5/13 : Selects the next available Effect in FX Slot 1 for the Left/Right Deck.
Pad 6/14 : Selects the next available Effect in FX Slot 2 for the Left/Right Deck.
Pad 7/15 : Selects the next available Effect in FX Slot 3 for the Left/Right Deck.
Pad 8/16 : Toggles FX Temp mode for the Left/Right Deck. Effects will be triggered temporary when enabled (LED On)
PAD BANK C - Pads Mode
KEY
ACTION
SHIFT (SECONDARY) ACTION
PAD BANK D - Transport Mode
KEY
ACTION
SHIFT (SECONDARY) ACTION
Pad 2/10 : STOP button. Stops track at the CUE point or the beginning of the track if not set. When paused, cycles through all the stored CUE points.
Pad 3/11 : PLAY. Play/pauses track
Pad 4/12 : SYNC. synchronizes tempo and phase with the ones from the opposite deck
Pad 5/13 : Selects the previous/next (smaller/greater) available Pitch range. Global setting - applies to both decks
Pad 6/14 : Pitch Bend - . Temporary (while pressed) decreases track's tempo. Tempo will resume to the value designated by the Pitch fader.
Pad 7/15 : Pitch Bend +. Temporary (while pressed) increases track's tempo. Tempo will resume to the value designated by the Pitch fader.
Pad 8/16 : Pitch reset. Smoothly resets Tempo to its original value.
CONTROLS
KEY
ACTION
SHIFT (SECONDARY) ACTION
Sampler, Effects and Pads mode
* The CONTROL BANK buttons are hardware controls, they do not send any MIDI message, so cannot be assigned to a VirtualDJ action.
CONTROL FADERS (ALL MODES)
KEY
ACTION
CONTROL BUTTONS (ALL MODES)
KEY
ACTION
CONTROL ENCODERS
KEY
ACTION
SAMPLER MODE (BANK A)
ENCODERS 4-8
EFFECTS MODE (BANK B)
KEY
ACTION
SHIFT (SECONDARY) ACTION
Multi FX mode : Adjust the 1st Parameter of the selected Effect in FX Slot 1 on the Left deck.
Multi FX mode : Adjust the 2nd Parameter of the selected Effect in FX Slot 1 on the Left deck
Multi FX mode : Adjust the 1st Parameter of the selected Effect in FX Slot 2 on the Left deck.
Multi FX mode : Adjust the 2nd Parameter of the selected Effect in FX Slot 2 on the Left deck
Multi FX mode : Adjust the 1st Parameter of the selected Effect in FX Slot 3 on the Left deck.
Multi FX mode : Adjust the 2nd Parameter of the selected Effect in FX Slot 3 on the Left deck
Multi FX mode : Adjust the 1st Parameter of the selected Effect in FX Slot 1 on the Right deck.
Multi FX mode : Adjust the 2nd Parameter of the selected Effect in FX Slot 1 on the Right deck
Multi FX mode : Adjust the 1st Parameter of the selected Effect in FX Slot 2 on the Right deck.
Multi FX mode : Adjust the 2nd Parameter of the selected Effect in FX Slot 2 on the Right deck
Multi FX mode : Adjust the 1st Parameter of the selected Effect in FX Slot 3 on the Right deck.
Multi FX mode : Adjust the 2nd Parameter of the selected Effect in FX Slot 3 on the Right deck
PADS MODE (BANK C)
OTHER CONTROLS

SOFTWARE CONTROLS
KEY
ACTION
* HARDWARE CONTROLS
KEY
ACTION
Note: This button is disabled by default since the external MIDI clock source is enabled. If you wish to disable external Midi Clock from VirtualDJ, right-click on the AKAI MPD232 entry in VirtualDJ Settings->Controllers tab.
Note : Makes sense to use this mode in Sampler mode only
the 16 velocity PADS will send full velocity speed, regardless the pushing strength
* SEQUENCER
Read further about Sequencer in the AKAI MPD232 Manual http://www.akaipro.com/product/mpd232#downloads
* Note : All the above Hardware buttons do not send any MIDI message, so cannot be assigned to any VirtualDJ action.
ADVANCED SETUP
PROGRAMS & MIDI DEVICES
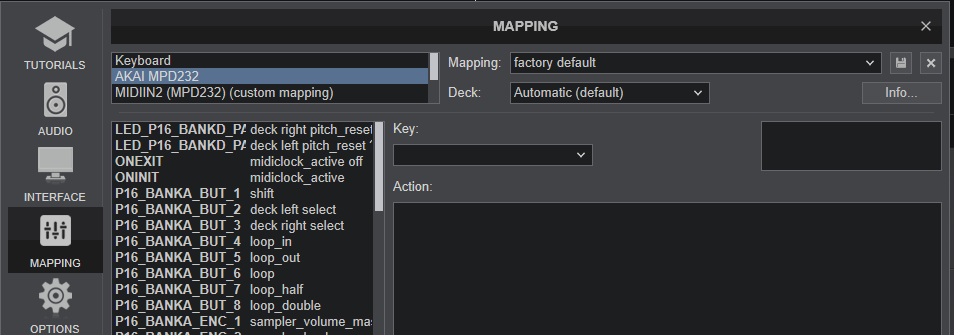
The MPD232 will be detected as 4 separate units in VirtualDJ Settings->Controllers tab as shown in the image above.
The 1st one (displayed as AKAI MPD232) is the one pre-defined in VirtualDJ (offers factory default mapping) and sends/receives MIDI/CC messages that use USBA1 to USBA16 MIDI Channels.
VirtualDJ reserves Program 16 and regardless of the changes you may do using the Editor or the EDIT mode of the unit, the MIDI Notes, Channels, Colors etc will not be changed and will be reloaded next time you start VirtualDJ.
You may use and program all other Programs (1 to 15 and 17 to 30), but make sure you don't use USBA16 MIDI Channel, or else operation issues may occur.
Since Programs 1 to 15 are pre-defined for other DAW applications, it is also suggested not to use any other Program except the Nr.16, unless you made sure that your preset Programs do not use USBA16 Midi channel.
The 2nd detected unit (MIDIIN2 or similar name on Mac OSX) holds the MIDI notes when USB B1 to USB B16 MIDI Channels are used.
The 3rd detected unit (MIDIIN3 or similar name on Mac OSX) holds the MIDI/CC messages sent when an external MIDI device is connected to the MIDI IN/OUT sockets at the rear panel of the unit.
The 4th detected unit (MIDIIN4 or similar name on Mac OSX) offers the MIDI/CC messages sent/received from the Remote application/device
The MIDIIN2,3,4 units can be mapped as "Simple Midi" in VirtualDJ.
The Programs can be defined and saved to the unit with the MPD232 Editor offered at http://www.akaipro.com/product/mpd232#downloads
RGB COLORS
Even though the unit offers the ability to color the PADS with different colors, those cannot be changed via MIDI. You can only change the On and Off state colors from the Editor.
The colors in the VirtualDJ Program 16 cannot be changed. The default preset will be re-loaded each time you open VirtualDJ.
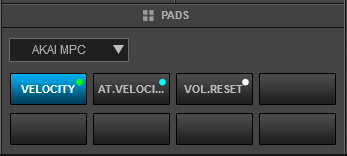
VELOCITY
The 16 PADS offer Velocity and After-Touch Velocity and is pre-defined and used in Sampler mode to control the Volume of the triggered Sample.
In Velocity, the Volume of the Sample is determined by the initial pressure applied to the Pad when pushed.
In After-Touch Velocity, the Volume of the Sample is continuously affected by the applied pressure, as long as the Pad is pushed.
Both Velocity and After-Touch Velocity are disabled by default. Select the special AKAI MPD Pads Page (available only when the unit is connected) on any deck to enable/disable them. Use the 3rd Pad in the Page to reset the Volumes of all Samples to 100% (useful when Velocity is disabled and Volumes are left to 0% on release)